martes, 14 de febrero de 2023

Cual es el lenguaje de programación más verde?

Cual es el lenguaje de programación más verde o más ecológico? 

Cuando elegimos lenguajes de programación, generalmente lo hacemos en función de su sintaxis, rendimiento o incluso curva de aprendizaje. Sin embargo, hace unos años, un grupo de investigadores portugueses investigó el consumo de energía de 27 lenguajes fueron medidos por su consumo de energía. 

El resumen del artículo dice lo siguiente:

“Este documento presenta un estudio del tiempo de ejecución, el uso de la memoria y el consumo de energía de veintisiete lenguajes de software bien conocidos. Supervisamos el rendimiento de dichos lenguajes utilizando diez problemas de programación diferentes, expresados en cada uno de los lenguajes. Nuestros resultados muestran hallazgos interesantes, como lenguaje más lentos o más rápidos que consumen menos o más energía, y cómo el uso de la memoria influye en el consumo de energía. Mostramos cómo usar nuestros resultados para brindar apoyo a los ingenieros de software para decidir qué lenguaje usar cuando la eficiencia energética es una preocupación”.

Los resultados son los siguientes:


jueves, 9 de febrero de 2023

Mastering API Architecture


EBOOK
[eBook] Mastering API Architecture
Hi Emanuel,

Designing and evolving your API architecture is a continuous journey. While you cannot predict how technology and business requirements will change, you can be sure APIs are key to a successful digital strategy. This O’Reilly eBook gives you practical tips on building, managing, and securing APIs, illustrated with a case study about moving a legacy application to the cloud.

In this eBook you will learn:

  • How to transition a legacy application to the cloud, illustrated through a case study
  • API fundamentals such as standards, schema, and specification
  • About API gateways, service mesh, and Kubernetes and when to use each
  • How to mitigate the most common API security risks in the OWASP API Top Ten

martes, 7 de febrero de 2023

Hacer un endpoit para saber el estado del host con echo en Golang parte 2


Todo muy lindo en el post anterior peeeeroo nos falto saber el estado del server, para ello vamos a utilizar la librería : "github.com/shirou/gopsutil". La idea es saber si tiene memoria libre, si el micro esta a full, etc. (estado de los recursos) 

Vamos a necesitar una estructura que contenga toda la información a mostrar : 


type StatusInfo struct {

RuntimeOS            string `json:"runtimeOS"`

TotalMemory          string `json:"total_memory"`

FreeMemory           string `json:"free_memory"`

PercentageUsedMemory string `json:"percentage_used_memory"`


TotalDiskSpace           string `json:"total_disk_space"`

UsedDiskSpace            string `json:"used_disk_space"`

FreeDiskSpace            string `json:"free_disk_space"`

PercentageDiskSpaceUsage string `json:"percentage_disk_space_usage"`


CpuIndexNumber string `json:"cpu_index_number"`

VendorId       string `json:"vendorId"`

Family         string `json:"family"`

NumberOfCores  string `json:"number_of_cores"`

ModelName      string `json:"model_name"`

Speed          string `json:"speed"`


Hostname                 string `json:"hostname"`

Uptime                   string `json:"uptime"`

NumberOfProcessesRunning string `json:"number_of_processes_running"`


Os       string `json:"os"`

Platform string `json:"platform"`


HostId string `json:"host_id"`

}

Y con la librería gopsutil podemos llenar el struct: 


func status(c echo.Context) error {

runtimeOS := runtime.GOOS

// memory

vmStat, err := mem.VirtualMemory()

dealwithErr(err)


diskStat, err := disk.Usage("/")

dealwithErr(err)


// cpu - get CPU number of cores and speed

cpuStat, err := cpu.Info()

dealwithErr(err)


// host or machine kernel, uptime, platform Info

hostStat, err := host.Info()

dealwithErr(err)


var sInfo StatusInfo


sInfo.RuntimeOS = runtimeOS

sInfo.TotalMemory = strconv.FormatUint(vmStat.Total, 10) + " bytes "

sInfo.FreeMemory = strconv.FormatUint(vmStat.Free, 10) + " bytes"

sInfo.PercentageUsedMemory = strconv.FormatFloat(vmStat.UsedPercent, 'f', 2, 64) + "%"


sInfo.TotalDiskSpace = strconv.FormatInt(int64(diskStat.Total), 10) + " bytes "

sInfo.UsedDiskSpace = strconv.FormatInt(int64(diskStat.Used), 10) + " bytes"

sInfo.FreeDiskSpace = strconv.FormatInt(int64(diskStat.Free), 10) + " bytes"

sInfo.PercentageDiskSpaceUsage = strconv.FormatFloat(diskStat.UsedPercent, 'f', 2, 64) + "%"


sInfo.CpuIndexNumber = strconv.FormatInt(int64(cpuStat[0].CPU), 10)

sInfo.VendorId = cpuStat[0].VendorID

sInfo.Family = cpuStat[0].Family

sInfo.NumberOfCores = strconv.FormatInt(int64(cpuStat[0].Cores), 10)

sInfo.ModelName = cpuStat[0].ModelName

sInfo.Speed = strconv.FormatFloat(cpuStat[0].Mhz, 'f', 2, 64)


sInfo.Hostname = hostStat.Hostname

sInfo.Uptime = strconv.FormatUint(hostStat.Uptime, 10)

sInfo.NumberOfProcessesRunning = strconv.FormatUint(hostStat.Procs, 10)


sInfo.Os = hostStat.OS

sInfo.Platform = hostStat.Platform


sInfo.HostId = hostStat.HostID


return c.JSON(http.StatusOK, sInfo)

}


Uso una función para mostrar el error : 


func dealwithErr(err error) {

if err != nil {

fmt.Println(err)

}

}


Y por último agregamos un endpoint en nuestro main: 


func main() {

e := echo.New()

        ....

e.GET("/status", func(c echo.Context) error {

return status(c)

})

e.Logger.Fatal(e.Start(":1323"))

}

Si vamos a localhost:1323/status podemos obtenere una salida como esta : 

{"runtimeOS":"linux","total_memory":"20769558528 bytes ","free_memory":"2220945408 bytes","percentage_used_memory":"75.97%","total_disk_space":"745407905792 bytes ","used_disk_space":"7737049088 bytes","free_disk_space":"737670856704 bytes","percentage_disk_space_usage":"1.04%","cpu_index_number":"0","vendorId":"GenuineIntel","family":"6","number_of_cores":"1","model_name":"11th Gen Intel(R) Core(TM) i7-1165G7 @ 2.80GHz","speed":"4700.00","hostname":"crespo","uptime":"262837","number_of_processes_running":"462","os":"linux","platform":"ubuntu","host_id":"c47f72aa-2ce5-414b-97ad-d51759c9a406"}


sábado, 4 de febrero de 2023

Libros gratuitos de Java Code Geeks.


Download FREE IT Guides!


Full Stack Development with Spring Boot and React - Third Edition ($37.99 Value) FREE for a Limited Time

Taking a practical approach, this book will first walk you through the latest Spring Boot features for creating a robust backend, covering everything from setting up the environment and dependency injection to security and testing.


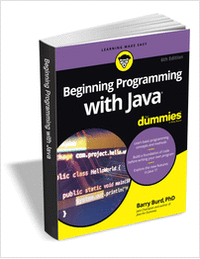
Beginning Programming with Java For Dummies, 6th Edition ($18.00 Value) FREE for a Limited Time

Consider Beginning Programming with Java For Dummies your indispensable guide to learning how to program in one of the most popular programming languages—Java! Java is an invaluable language to master


Uncommon Accountability: A Radical New Approach To Greater Success and Fulfillment ($25.00 Value) FREE for a Limited Time

The implementation of true, organization-wide accountability has the potential to transform your firm’s—and your personal—performance. Unfortunately, the word “accountability” often has negative connotations, including blame, fear, and conflict.


Best Python Courses

Python is a popular computer programming language. Many people choose to learn Python because it is easy to pick up compared with other programming languages. It is often the language of choice for automation and data science tasks

 
This is third-party material. If you're downloading a whitepaper or ebook for the first time, our distribution service, TradePub, will ask for some personal information in order to help us understand our audience. You will only have to do this once. After that, the system will recognise you. Note: We promise to respect your privacy and keep all information we collect safe. We will never share or sell your information with third parties.

Python en Español


Quiero recomendar una pagina que esta muy buena que se llama hablemos python, lo que trata es de unificar todos los recursos de python en español. 

Una propuesta genial, en esta pagina tenes canales de youtube, chat de telegram, canales de discord, cursos, tutoriales, preguntas frecuentes, ofertas de trabajo, etc... 

Dejo link: https://hablemospython.dev/

Foldable y Traverse parte 7

Nuestros métodos listTraverse y listSequence funcionan con cualquier tipo de Aplicativo, pero solo funcionan con un tipo de secuencia: List. Podemos generalizar sobre diferentes tipos de secuencias utilizando una type class, lo que nos lleva a Cats' Traverse. Aquí está la definición abreviada:

package cats

trait Traverse[F[_]] {

    def traverse[G[_]: Applicative, A, B] (inputs: F[A])(func: A => G[B]): G[F[B]]

    def sequence[G[_]: Applicative, B] (inputs: F[G[B]]): G[F[B]] = traverse(inputs)(identity)

}

Cats proporciona instancias de Poligonal para List, Vector, Stream, Option, Either y una variedad de otros tipos. Podemos invocar instancias como de costumbre usando Traverse.apply y usar los métodos poligonal y de secuencia como se describe en la sección anterior:


import cats.Traverse

import cats.instances.future._ // for Applicative

import cats.instances.list._


// for Traverse

val totalUptime: Future[List[Int]] = Traverse[List].traverse(hostnames)(getUptime)

Await.result(totalUptime, 1.second)

// res0: List[Int] = List(1020, 960, 840)


val numbers = List(Future(1), Future(2), Future(3))

val numbers2: Future[List[Int]] = Traverse[List].sequence(numbers)

Await.result(numbers2, 1.second)

// res1: List[Int] = List(1, 2, 3)


También hay versiones sintácticas de los métodos, importadas a través de cats.syntax.traverse:


import cats.syntax.traverse._ // for sequence and traverse

Await.result(hostnames.traverse(getUptime), 1.second)

// res2: List[Int] = List(1020, 960, 840)

Await.result(numbers.sequence, 1.second)

// res3: List[Int] = List(1, 2, 3)


Como puede ver, ¡es mucho más compacto y legible que el código foldLeft con el que comenzamos al principio!

Hacer un endpoit para saber el estado del host con echo en Golang


Me quedo relargo el titulo... pero esa es la idea, hacer uno o más endpoints que me digan si el host responde para saber ante un problema que hacer. 

Para esto usamos echo y hacemos algo tan fácil como esto: 

func main() {

e := echo.New()

e.GET("/health", func(c echo.Context) error {

return c.String(http.StatusOK, "Ok")

})

e.Logger.Fatal(e.Start(":1323"))

}


Ahora si hacemos un pedido por el método GET a la url /health y nos contesta, esta todo bien y si no bueno vamos a tener que investigar. 

Supongamos que queremos saber información del host, por X motivo en este caso podemos utilizar una librería llamada "github.com/zcalusic/sysinfo" 

Primero agregamos el endpoint : 


func main() {

e := echo.New()

e.GET("/health", func(c echo.Context) error {

return c.String(http.StatusOK, "Ok")

})


e.GET("/info", func(c echo.Context) error {

return info(c)

})

e.Logger.Fatal(e.Start(":1323"))

}


Ahora programamos la función info : 


func info(c echo.Context) error {

var si sysinfo.SysInfo

si.GetSysInfo()


return c.JSON(http.StatusOK, si)

}


Y listo, igual esto no es taaaannn útil, sería mejor saber tambien el estado del server, pero eso es para otro post. 


Foldable y Traverse parte 6

Podemos reescribir la poligonal en términos de un Aplicativo. Nuestro acumulador del ejemplo anterior:


Future(List.empty[Int])


es equivalente a Applicative.pure:


import cats.Applicative

import cats.instances.future._ // for Applicative

import cats.syntax.applicative._ // for pure

List.empty[Int].pure[Future]


Nuestro combinador, que solía ser este:


def oldCombine(accum : Future[List[Int]],host: String): Future[List[Int]] = {

val uptime = getUptime(host)

for {

        accum <- accum

        uptime <- uptime

    } yield accum :+ uptime

}


ahora es equivalente a Semigroupal.combine:


import cats.syntax.apply._ // for mapN

// Combining accumulator and hostname using an Applicative:

def newCombine(accum: Future[List[Int]], host: String): Future[List[Int]] =

(accum, getUptime(host)).mapN(_ :+ _)


Al sustituir estos fragmentos en la definición de poligonal, podemos generalizarla para que funcione con cualquier aplicativo:


def listTraverse[F[_]: Applicative, A, B] (list: List[A])(func: A => F[B]): F[List[B]] =

list.foldLeft(List.empty[B].pure[F]) { (accum, item) =>

(accum, func(item)).mapN(_ :+ _)

}


def listSequence[F[_]: Applicative, B] (list: List[F[B]]): F[List[B]] =

listTraverse(list)(identity)


Podemos usar listTraverse para volver a implementar nuestro ejemplo de tiempo de actividad:


val totalUptime = listTraverse(hostnames)(getUptime)

Await.result(totalUptime, 1.second)

// res5: List[Int] = List(1020, 960, 840)


o podemos usarlo con otros tipos de datos de Applicative.


sábado, 28 de enero de 2023

Node + Typescript, configuraciones y scripts útiles


Si ya configuraste el entorno como un campeon, veamos unos trucos para que todo vaya como piña. 

Recarga en frío: La recarga en frío es buena para el desarrollo local. Para hacer esto, tendremos que instalar y configurar en un par de paquetes más: ts-node para ejecutar el código de mecanografiado directamente sin tener que esperar a que se compilara, y nodemon, para observar los cambios en nuestro código y reiniciar automáticamente cuando un el archivo ha cambiado.


npm install --save-dev ts-node nodemon


Ahora debemos agregar una configuración de nodemon.json.


{

  "watch": ["src"],

  "ext": ".ts,.js",

  "ignore": [],

  "exec": "npx ts-node ./src/index.ts"

}


Y luego, para ejecutar el proyecto, todo lo que tenemos que hacer es ejecutar nodemon. Agreguemos un script para eso.


"start:dev": "npx nodemon",


Al ejecutar npm run start:dev, npx nodemon iniciará nuestra aplicación usando npx ts-node ./src/index.ts, buscando cambios en los archivos .ts y .js desde /src.


Para limpiar y compilar el proyecto para la producción, podemos agregar un script de compilación.

Instalamos rimraf, una herramienta multiplataforma que actúa como el comando rm -rf (simplemente borra todo lo que le indique).


npm install --save-dev rimraf


Y luego, agregamos esto en paquete.json.


"build": "rimraf ./build && tsc",


Ahora, cuando ejecutamos npm run build, rimraf eliminará nuestra carpeta de compilación anterior antes de que el compilador de TypeScript emita código nuevo para dist.


Para iniciar la aplicación en producción, todo lo que debemos hacer es ejecutar primero el comando de compilación y luego ejecutar el JavaScript compilado en build/index.js. El script de inicio se ve así.

"start": "npm run build && node build/index.js"


Y listo. 


Foldable y Traverse parte 5

foldLeft y foldRight son métodos de iteración flexibles, pero requieren mucho trabajo para definir acumuladores y funciones combinadoras. La clase de tipo Traverse es una herramienta de nivel superior que aprovecha Applicatives para proporcionar un patrón de iteración más conveniente y más legible.

Podemos demostrar Traverse utilizando los métodos Future.traverse y Future.sequence en la biblioteca estándar de Scala. Estos métodos proporcionan implementaciones específicas de Future del patrón poligonal. Como ejemplo, supongamos que tenemos una lista de servidores y un método para sondear un host por su tiempo de actividad:


import scala.concurrent._

import scala.concurrent.duration._

import scala.concurrent.ExecutionContext.Implicits.global

val hostnames = List(

    "alpha.example.com",

    "beta.example.com",

    "gamma.demo.com"

)

def getUptime(hostname: String): Future[Int] = Future(hostname.length * 60) // just for demonstration


Ahora, supongamos que queremos sondear todos los hosts y recopilar todos sus tiempos de actividad. No podemos simplemente asignar nombres de host porque el resultado, una Lista [Futuro [Int]], contendría más de un Futuro. Necesitamos reducir los resultados a un solo futuro para obtener algo que podamos bloquear. Comencemos haciendo esto manualmente usando un pliegue:


val allUptimes: Future[List[Int]] = hostnames.foldLeft(Future(List.empty[Int])) {

    (accum, host) =>

        val uptime = getUptime(host)

        for {

           accum  <- accum

           uptime <- uptime

        } yield accum :+ uptime

}

Await.result(allUptimes, 1.second)

// res0: List[Int] = List(1020, 960, 840)


Intuitivamente, iteramos sobre nombres de host, llamamos a func para cada elemento y combinamos los resultados en una lista. Esto suena simple, pero el código es bastante difícil de manejar debido a la necesidad de crear y combinar Futuros en cada iteración. Podemos mejorar mucho las cosas usando Future.traverse, que está hecho a medida para este patrón:


val allUptimes: Future[List[Int]] = Future.traverse(hostnames)(getUptime)

Await.result(allUptimes, 1.second)

// res2: List[Int] = List(1020, 960, 840)


Esto es mucho más claro y conciso. Veamos cómo funciona. Si ignoramos distracciones como CanBuildFrom y ExecutionContext, la implementación de Future.traverse en la biblioteca estándar se ve así:


def traverse[A, B](values: List[A])

(func: A => Future[B]): Future[List[B]] = values.foldLeft(Future(List.empty[B])) { 

    (accum, host) =>

        val item = func(host)

        for {

             accum <- accum

             item <- item

       } yield accum :+ item

}


Esto es esencialmente lo mismo que nuestro código de ejemplo anterior. Future.traverse está abstrayendo el dolor de plegar y definir acumuladores y funciones de combinación. Nos brinda una interfaz limpia de alto nivel para hacer lo que queramos:

  • empezar con una Lista[A];
  • proporcionar una función A => Futuro[B];
  • terminar con un Futuro[Lista[B]].
La biblioteca estándar también proporciona otro método, Future.sequence, que asume que comenzamos con List[Future[B]] y no necesitamos proporcionar una función de identidad:

object Future {
    def sequence[B](futures: List[Future[B]]): Future[List[B]] = traverse(futures)(identity)
// etc...
}

En este caso la comprensión intuitiva es aún más sencilla:

  • empezar con una Lista[Futuro[A]];
  • terminar con un Futuro[Lista[A]].
Future.traverse y Future.sequence resuelven un problema muy específico: nos permiten iterar sobre una secuencia de Futuros y acumular un resultado. Los ejemplos simplificados anteriores solo funcionan con Listas, pero el Future.traverse y Future.sequence funcionan con cualquier colección estándar de Scala.

La clase de tipo Traverse de Cats generaliza estos patrones para que funcionen con cualquier tipo de Aplicativo: Futuro, Opción, Validado, etc. 

martes, 24 de enero de 2023

Como crear un proyecto en Node + Typescript?


Empecemos, vamos a una cosola y creamos una carpeta : 

mkdir typescript-starter

cd typescript-starter


Ahora tenemos que crear el package.json

npm init -y


Luego agregamos Typescript como una dependencia de dev : 

npm install typescript --save-dev


Luego de instalar esto podemos usar el comando tsc. Además TypeScript tiene tipos implícitos, explícitos y ambientales. Los tipos ambientales son tipos que se agregan al ámbito de ejecución global. Dado que estamos usando Node, sería bueno si pudiéramos obtener seguridad de tipo y finalización automática en las API de Node como archivo, ruta, proceso, etc. Eso es lo que hará la instalación de la definición de tipo DefinitelyTyped para Node:

npm install @types/node --save-dev


tsconfig.json es el archivo donde typescript tiene todas sus definiciones y lo creamos con este comando: 

npx tsc --init --rootDir src --outDir build \

--esModuleInterop --resolveJsonModule --lib es6 \

--module commonjs --allowJs true --noImplicitAny true


  • rootDir: Aquí es donde TypeScript busca nuestro código. Lo hemos configurado para buscar en la carpeta src/. Ahí es donde escribiremos nuestro TypeScript.
  • outDir: Donde TypeScript pone nuestro código compilado. Queremos que vaya a una carpeta build/.
  • esModuleInterop: si estuvimos en el espacio de JavaScript durante los últimos años, es posible que haya reconocido que los sistemas de módulos se han descontrolado un poco (AMD, SystemJS, ES Modules, etc.). Para un tema que requiere una discusión mucho más larga, si usamos commonjs como nuestro sistema de módulos (para las aplicaciones de Node, debería hacerlo), entonces necesitamos que esto se establezca en verdadero.
  • resolveJsonModule: si usamos JSON en este proyecto, esta opción permite que TypeScript lo use.
  • lib: esta opción agrega tipos ambientales a nuestro proyecto, lo que nos permite confiar en funciones de diferentes versiones de Ecmascript, bibliotecas de prueba e incluso la API DOM del navegador. 
  • módulo: commonjs es el sistema de módulo de Nodo estándar en 2019. Usemos eso.
  • allowJs: si está convirtiendo un proyecto antiguo de JavaScript a TypeScript, esta opción le permitirá incluir archivos .js entre los .ts.
  • noImplicitAny: en los archivos TypeScript, no permita que se especifique un tipo de forma no explícita. Cada tipo debe tener un tipo específico o declararse explícitamente cualquiera. Sin anys implícitos.

Luego de ejecutar este comando, tenemos un archivo tsconfig.json algo así: 

{

  "compilerOptions": {

    /* Visit https://aka.ms/tsconfig to read more about this file */


    /* Projects */

    // "incremental": true,                              /* Save .tsbuildinfo files to allow for incremental compilation of projects. */

    // "composite": true,                                /* Enable constraints that allow a TypeScript project to be used with project references. */

    // "tsBuildInfoFile": "./.tsbuildinfo",              /* Specify the path to .tsbuildinfo incremental compilation file. */

    // "disableSourceOfProjectReferenceRedirect": true,  /* Disable preferring source files instead of declaration files when referencing composite projects. */

    // "disableSolutionSearching": true,                 /* Opt a project out of multi-project reference checking when editing. */

    // "disableReferencedProjectLoad": true,             /* Reduce the number of projects loaded automatically by TypeScript. */


    /* Language and Environment */

    "target": "es2016",                                  /* Set the JavaScript language version for emitted JavaScript and include compatible library declarations. */

    "lib": ["es6"],                                      /* Specify a set of bundled library declaration files that describe the target runtime environment. */

    // "jsx": "preserve",                                /* Specify what JSX code is generated. */

    // "experimentalDecorators": true,                   /* Enable experimental support for TC39 stage 2 draft decorators. */

    // "emitDecoratorMetadata": true,                    /* Emit design-type metadata for decorated declarations in source files. */

    // "jsxFactory": "",                                 /* Specify the JSX factory function used when targeting React JSX emit, e.g. 'React.createElement' or 'h'. */

    // "jsxFragmentFactory": "",                         /* Specify the JSX Fragment reference used for fragments when targeting React JSX emit e.g. 'React.Fragment' or 'Fragment'. */

    // "jsxImportSource": "",                            /* Specify module specifier used to import the JSX factory functions when using 'jsx: react-jsx*'. */

    // "reactNamespace": "",                             /* Specify the object invoked for 'createElement'. This only applies when targeting 'react' JSX emit. */

    // "noLib": true,                                    /* Disable including any library files, including the default lib.d.ts. */

    // "useDefineForClassFields": true,                  /* Emit ECMAScript-standard-compliant class fields. */

    // "moduleDetection": "auto",                        /* Control what method is used to detect module-format JS files. */


    /* Modules */

    "module": "commonjs",                                /* Specify what module code is generated. */

    "rootDir": "src",                                    /* Specify the root folder within your source files. */

    // "moduleResolution": "node",                       /* Specify how TypeScript looks up a file from a given module specifier. */

    // "baseUrl": "./",                                  /* Specify the base directory to resolve non-relative module names. */

    // "paths": {},                                      /* Specify a set of entries that re-map imports to additional lookup locations. */

    // "rootDirs": [],                                   /* Allow multiple folders to be treated as one when resolving modules. */

    // "typeRoots": [],                                  /* Specify multiple folders that act like './node_modules/@types'. */

    // "types": [],                                      /* Specify type package names to be included without being referenced in a source file. */

    // "allowUmdGlobalAccess": true,                     /* Allow accessing UMD globals from modules. */

    // "moduleSuffixes": [],                             /* List of file name suffixes to search when resolving a module. */

    "resolveJsonModule": true,                           /* Enable importing .json files. */

    // "noResolve": true,                                /* Disallow 'import's, 'require's or '<reference>'s from expanding the number of files TypeScript should add to a project. */


    /* JavaScript Support */

    "allowJs": true,                                     /* Allow JavaScript files to be a part of your program. Use the 'checkJS' option to get errors from these files. */

    // "checkJs": true,                                  /* Enable error reporting in type-checked JavaScript files. */

    // "maxNodeModuleJsDepth": 1,                        /* Specify the maximum folder depth used for checking JavaScript files from 'node_modules'. Only applicable with 'allowJs'. */


    /* Emit */

    // "declaration": true,                              /* Generate .d.ts files from TypeScript and JavaScript files in your project. */

    // "declarationMap": true,                           /* Create sourcemaps for d.ts files. */

    // "emitDeclarationOnly": true,                      /* Only output d.ts files and not JavaScript files. */

    // "sourceMap": true,                                /* Create source map files for emitted JavaScript files. */

    // "outFile": "./",                                  /* Specify a file that bundles all outputs into one JavaScript file. If 'declaration' is true, also designates a file that bundles all .d.ts output. */

    "outDir": "build",                                   /* Specify an output folder for all emitted files. */

    // "removeComments": true,                           /* Disable emitting comments. */

    // "noEmit": true,                                   /* Disable emitting files from a compilation. */

    // "importHelpers": true,                            /* Allow importing helper functions from tslib once per project, instead of including them per-file. */

    // "importsNotUsedAsValues": "remove",               /* Specify emit/checking behavior for imports that are only used for types. */

    // "downlevelIteration": true,                       /* Emit more compliant, but verbose and less performant JavaScript for iteration. */

    // "sourceRoot": "",                                 /* Specify the root path for debuggers to find the reference source code. */

    // "mapRoot": "",                                    /* Specify the location where debugger should locate map files instead of generated locations. */

    // "inlineSourceMap": true,                          /* Include sourcemap files inside the emitted JavaScript. */

    // "inlineSources": true,                            /* Include source code in the sourcemaps inside the emitted JavaScript. */

    // "emitBOM": true,                                  /* Emit a UTF-8 Byte Order Mark (BOM) in the beginning of output files. */

    // "newLine": "crlf",                                /* Set the newline character for emitting files. */

    // "stripInternal": true,                            /* Disable emitting declarations that have '@internal' in their JSDoc comments. */

    // "noEmitHelpers": true,                            /* Disable generating custom helper functions like '__extends' in compiled output. */

    // "noEmitOnError": true,                            /* Disable emitting files if any type checking errors are reported. */

    // "preserveConstEnums": true,                       /* Disable erasing 'const enum' declarations in generated code. */

    // "declarationDir": "./",                           /* Specify the output directory for generated declaration files. */

    // "preserveValueImports": true,                     /* Preserve unused imported values in the JavaScript output that would otherwise be removed. */


    /* Interop Constraints */

    // "isolatedModules": true,                          /* Ensure that each file can be safely transpiled without relying on other imports. */

    // "allowSyntheticDefaultImports": true,             /* Allow 'import x from y' when a module doesn't have a default export. */

    "esModuleInterop": true,                             /* Emit additional JavaScript to ease support for importing CommonJS modules. This enables 'allowSyntheticDefaultImports' for type compatibility. */

    // "preserveSymlinks": true,                         /* Disable resolving symlinks to their realpath. This correlates to the same flag in node. */

    "forceConsistentCasingInFileNames": true,            /* Ensure that casing is correct in imports. */


    /* Type Checking */

    "strict": true,                                      /* Enable all strict type-checking options. */

    "noImplicitAny": true,                               /* Enable error reporting for expressions and declarations with an implied 'any' type. */

    // "strictNullChecks": true,                         /* When type checking, take into account 'null' and 'undefined'. */

    // "strictFunctionTypes": true,                      /* When assigning functions, check to ensure parameters and the return values are subtype-compatible. */

    // "strictBindCallApply": true,                      /* Check that the arguments for 'bind', 'call', and 'apply' methods match the original function. */

    // "strictPropertyInitialization": true,             /* Check for class properties that are declared but not set in the constructor. */

    // "noImplicitThis": true,                           /* Enable error reporting when 'this' is given the type 'any'. */

    // "useUnknownInCatchVariables": true,               /* Default catch clause variables as 'unknown' instead of 'any'. */

    // "alwaysStrict": true,                             /* Ensure 'use strict' is always emitted. */

    // "noUnusedLocals": true,                           /* Enable error reporting when local variables aren't read. */

    // "noUnusedParameters": true,                       /* Raise an error when a function parameter isn't read. */

    // "exactOptionalPropertyTypes": true,               /* Interpret optional property types as written, rather than adding 'undefined'. */

    // "noImplicitReturns": true,                        /* Enable error reporting for codepaths that do not explicitly return in a function. */

    // "noFallthroughCasesInSwitch": true,               /* Enable error reporting for fallthrough cases in switch statements. */

    // "noUncheckedIndexedAccess": true,                 /* Add 'undefined' to a type when accessed using an index. */

    // "noImplicitOverride": true,                       /* Ensure overriding members in derived classes are marked with an override modifier. */

    // "noPropertyAccessFromIndexSignature": true,       /* Enforces using indexed accessors for keys declared using an indexed type. */

    // "allowUnusedLabels": true,                        /* Disable error reporting for unused labels. */

    // "allowUnreachableCode": true,                     /* Disable error reporting for unreachable code. */


    /* Completeness */

    // "skipDefaultLibCheck": true,                      /* Skip type checking .d.ts files that are included with TypeScript. */

    "skipLibCheck": true                                 /* Skip type checking all .d.ts files. */

  }

}

Regrande y con muchas opciones, pero si borramos los comentarios queda así : 

{

  "compilerOptions": {

    "target": "es5",                          

    "module": "commonjs",                    

    "lib": ["es6"],                     

    "allowJs": true,

    "outDir": "build",                          

    "rootDir": "src",

    "strict": true,         

    "noImplicitAny": true,

    "esModuleInterop": true,

    "resolveJsonModule": true

  }

}


Ahora vamos a probar si anda, para eso creamos la carpeta src y un archivo de prueba: 


mkdir src

touch src/index.ts


Y ponemos algo de código, para eso abrimos el archivo y escribimos: 

console.log('Hello world!')


Y ahora compilamos : 

npx tsc


Luego de compilar vamos a tener una carpeta llamada build que va contener un archivo index.js que contiene : 


"use strict";

console.log('Hello world!');


Y listo!! 


lunes, 23 de enero de 2023

GORM, un ORM para Golang


Grom es un ORM simple para Golang. Tiene todas las características de un ORM moderno como : 

  • Asociaciones (uno uno, uno a muchos, muchos a muchos, polimorfismo, herencia con una tabla única)
  • Hooks o Ganchos
  • Carga ansiosa con Preload, Joins
  • Transacciones, Transacciones anidadas, Checkpoints y rollback del checkpoint
  • Inserción por lotes, FindInBatches, Buscar/Crear con mapa, CRUD con SQL Expr y Context Valuer
  • SQL Builder, Upsert, Bloqueo, Optimizador/Índice/Sugerencias de comentarios, Argumento con nombre, Subconsulta
  • Migraciones automáticas
  • API de complemento extensible y flexible: Resolución de base de datos (bases de datos múltiples, división de lectura/escritura) / Prometheus...

Para instalarlo tenemos que ejecutar estos comandos: 

go get -u gorm.io/gorm

go get -u gorm.io/driver/sqlite


Y ya con eso podemos empezar a utilizarlo. Veamos un ejemplo : 

package main

import (
  "gorm.io/gorm"
  "gorm.io/driver/sqlite"
)

type Product struct {
  gorm.Model
  Code  string
  Price uint
}

func main() {
  db, err := gorm.Open(sqlite.Open("test.db"), &gorm.Config{})
  if err != nil {
    panic("failed to connect database")
  }

  // Migrate the schema
  db.AutoMigrate(&Product{})

  // Create
  db.Create(&Product{Code: "D42", Price: 100})

  // Read
  var product Product
  db.First(&product, 1) // find product with integer primary key
  db.First(&product, "code = ?", "D42") // find product with code D42

  // Update - update product's price to 200
  db.Model(&product).Update("Price", 200)
  // Update - update multiple fields
  db.Model(&product).Updates(Product{Price: 200, Code: "F42"}) // non-zero fields
  db.Model(&product).Updates(map[string]interface{}{"Price": 200, "Code": "F42"})

  // Delete - delete product
  db.Delete(&product, 1)
}

Dejo link: https://gorm.io/